Deck Construction 101: Framing Techniques for a Secure Deck
Deck construction is one of the most rewarding home improvement projects you can take on. It extends your living space outdoors and creates a perfect spot for gatherings, relaxation, or simply soaking in the sun. But here’s the kicker: if your deck’s framing isn’t solid, all the fun and beauty in the world won’t matter much because your deck could become unsafe or deteriorate quickly.
In this guide, we’ll walk through essential framing techniques that ensure your deck is sturdy, durable, and ready to handle years of memories.
Why Framing Matters in Deck Construction
Think of framing as the skeleton of your deck. Without a strong frame, the surface won’t hold up under weight or weather conditions. Good framing prevents sagging, wobbling, and structural failure — issues that are not just inconvenient but potentially dangerous.
Choosing the Right Lumber for Your Deck Frame
Not all wood is created equal when it comes to deck framing. Pressure-treated lumber is the go-to choice because it resists rot, insects, and moisture damage. Cedar and redwood are alternatives, but they tend to be pricier and may require more maintenance.
Look for lumber rated for ground contact if any part of your frame touches the earth — this helps prevent premature decay.
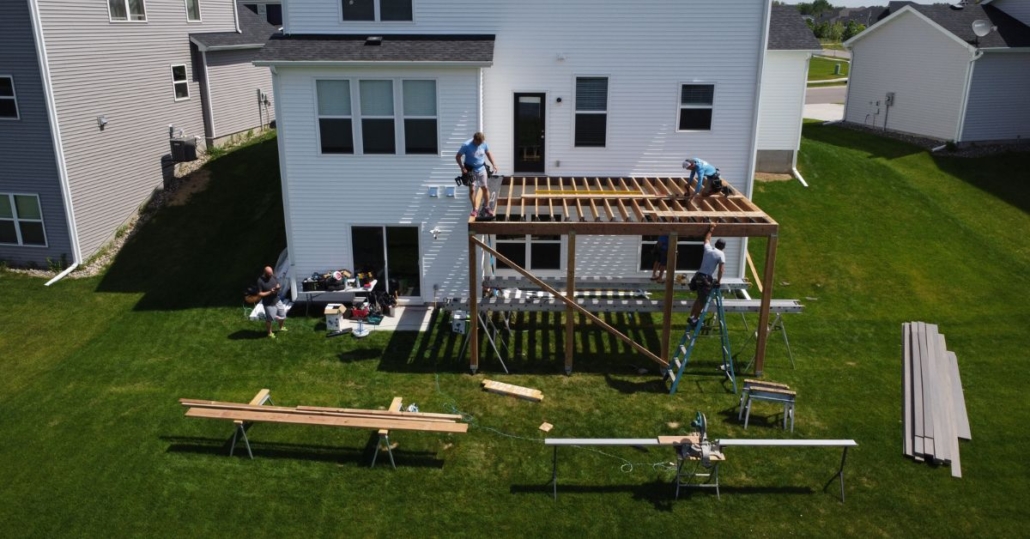
Laying the Foundation: Footings and Posts
Your deck’s stability starts underground. Footings are concrete bases that support the vertical posts holding up the frame. Typically, footings must extend below the frost line to avoid shifting during freeze-thaw cycles.
Posts are usually made from 4×4 or 6×6 lumber, anchored securely to the footings. Ensuring these are perfectly vertical and firmly set is key for the deck’s overall stability.
Installing the Ledger Board
The ledger board is the anchor that attaches your deck to the house. It must be securely fastened with lag bolts or structural screws to support the deck’s weight.
Proper flashing installation above the ledger is crucial to prevent water from seeping between the deck and the house — water damage here can lead to rot and structural problems.
Joist Layout and Spacing
Joists are the horizontal beams running perpendicular to the ledger, supporting the decking boards. The spacing between joists usually ranges from 12 to 16 inches on center, depending on the decking material and expected load.
Use joist hangers for added support and ease of installation. These metal brackets attach joists to the ledger and beams, distributing weight and preventing twisting or sagging.
 Beams: The Backbone of Your Deck
 Beams: The Backbone of Your Deck
Beams carry the joists and transfer weight down to the posts. Depending on the size and design of your deck, you might use single or double beams.
Larger spans need more robust beams, often made by laminating two or more boards together. The choice depends on the deck size, materials, and local building codes.
Cross-Bracing for Added Stability
To prevent your deck from swaying or shifting side to side, cross-bracing is essential. This involves installing diagonal braces between posts or between the posts and beams.
It’s a simple addition that dramatically increases your deck’s resistance to wind and everyday movement.
Checking for Level and Square
Building a deck isn’t just about nailing boards together — precision is everything. Use a level and carpenter’s square to make sure your framing is perfectly aligned.
A frame that’s out of square will cause problems down the line, including uneven decking boards and difficulty installing railings or stairs.
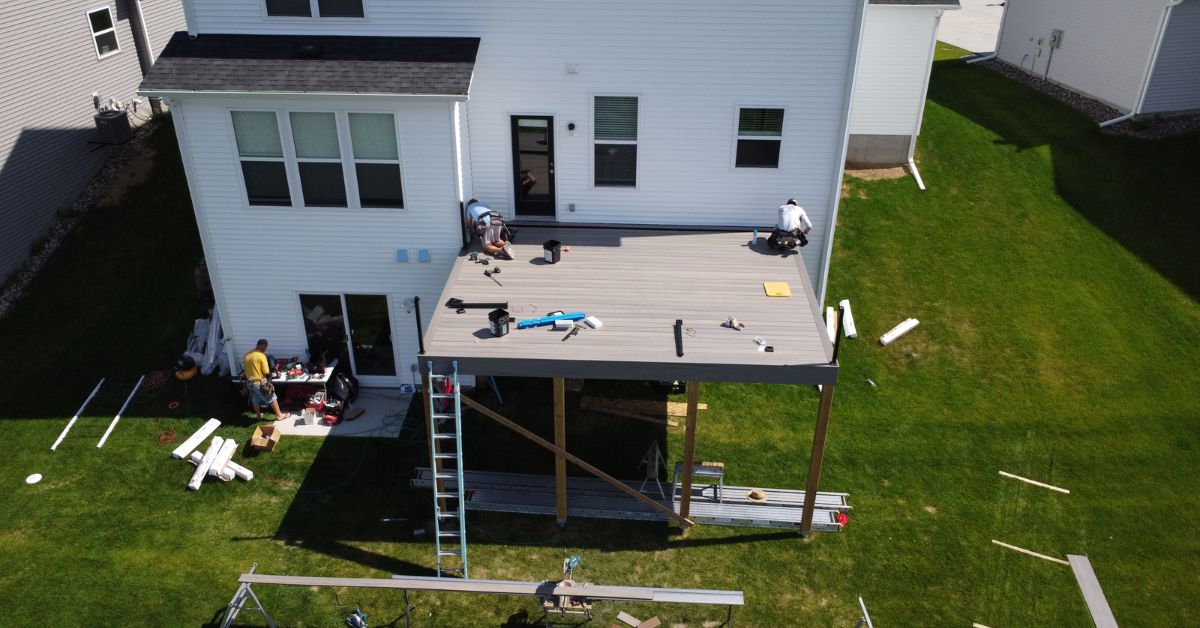
Decking Installation Tips
Once your frame is rock solid, installing the decking boards becomes much easier. Start at the house and work your way outward, leaving small gaps between boards for drainage and expansion.
Using screws designed for outdoor use will keep your deck looking good longer, as nails can back out or rust over time.
Understanding Local Building Codes and Permits
Before swinging that hammer, check your local building codes. They dictate everything from footing depth to railing height and joist spacing.
Getting the right permits not only keeps your project legal but also ensures safety standards are met — a crucial step if you plan to sell your home later.
Common Framing Mistakes to Avoid
-
Skipping Footings: Trying to place posts directly on soil leads to quick rot and instability.
-
Ignoring Ledger Flashing: Water damage at the ledger board is a top cause of deck failure.
-
Incorrect Joist Spacing: Too wide spacing causes sagging; too tight can waste materials and increase costs.
-
Weak Fastening: Using the wrong screws or nails reduces the lifespan and safety of your deck.
Tools You’ll Need for Deck Framing
To frame your deck like a pro, gather essential tools:
-
Circular saw
-
Power drill with screwdriver bits
-
Level and measuring tape
-
Carpenter’s square
-
Hammer and framing nails
-
Post hole digger or auger
-
Shovel for footing preparation
Tips for Working Safely
For any project, including deck construction, always wear protective gear like gloves, safety glasses, and hearing protection. Be cautious when working with power tools and heavy materials.
If you’re working on a multi-level deck or near power lines, consider hiring a professional for those parts.
Finishing Touches: Sealing and Protecting Your Deck
After framing and decking are complete, protect your investment with a quality sealant or stain. This keeps moisture out and prevents cracking or warping.
Regular maintenance every couple of years will extend your deck’s life and keep it looking fresh.
Deck construction can seem intimidating, but breaking it down into manageable steps makes it totally doable. Framing is where your deck’s future is shaped, so invest the time and care needed here. With the right materials, tools, and techniques, you’ll enjoy a secure, beautiful deck that lasts for decades.


